At Zonka Feedback, we believe that every interaction with your customers is an opportunity to gather insights and strengthen relationships. That’s why we make it easy to embed feedback surveys directly into Salesforce emails, turning everyday communications into powerful tools for understanding customer sentiment.
With Zonka Feedback integrated into Salesforce, you can automate surveys at key touchpoints—such as after a ticket resolution or post-purchase—and collect actionable feedback without ever leaving the Salesforce platform. Responses sync seamlessly with customer profiles, giving your teams a 360-degree view of customer satisfaction, loyalty, and effort scores like NPS, CSAT, and CES.
Embedding surveys in Salesforce emails empowers your business to:
-
Automate feedback collection and streamline workflows.
-
Identify areas of improvement in customer support, or services.
-
Act on feedback in real-time to enhance customer satisfaction and loyalty.
In this blog, we’ll walk you through how you can embed feedback surveys in Salesforce email and help your team stay connected with customers, close feedback loops, and drive meaningful improvements—all while working within Salesforce’s robust ecosystem.
How Embedding Zonka Feedback with Salesforce Can Help Your Business
Embedding surveys in Salesforce emails take customer engagement to the next level by transforming everyday emails into powerful tools for feedback collection and actionable insights. Whether you’re conducting NPS surveys, measuring CSAT, or gathering feedback on service interactions, embedding surveys ensures you’re always in sync with your customers’ experiences. Here’s how embedding surveys in Salesforce emails can benefit your business:
1. Unified Customer Profiles
By embedding surveys in Salesforce emails, you can enrich customer profiles with real-time feedback. Responses are synced directly into Salesforce, giving you a centralized view of customer insights. This unified approach helps teams across sales, service, and marketing collaborate effectively and make data-driven decisions.
For example, if a customer provides low-satisfaction feedback after a support interaction, this insight can trigger follow-up actions directly in Salesforce, ensuring the issue is addressed promptly.
2. Automate Feedback at Critical Touchpoints
Salesforce’s automation features allow you to send email surveys at key moments in the customer journey, such as:
-
Post-Ticket Resolution: Gather CSAT or CES scores to evaluate your team’s performance.
-
Post-Purchase Feedback: Conduct NPS surveys to gauge customer loyalty.
-
Onboarding Milestones: Assess how customers feel about their onboarding experience.
This automation ensures timely feedback collection, helping you monitor customer satisfaction without any manual effort.
3. Improve Team Performance with Real-Time Insights
By embedding surveys in your salesforce email, you can turn your usual email conversations into feedback emails measuring key metrics like Net Promoter Score (NPS), Customer Satisfaction (CSAT), and Customer Effort Score (CES):
-
Customer Support Teams can identify and address pain points in their service process.
-
Sales Teams can use feedback to tailor outreach and anticipate customer needs.
-
Marketing Teams can refine campaigns based on customer preferences and feedback trends.
For instance, feedback gathered after a support ticket closure can be used to improve response times or agent interactions.
4. Drive Better Marketing and Sales Campaigns
By profiling customers based on their survey responses, you can segment your audience more effectively and craft personalized campaigns. For example:
-
Identify loyal customers from NPS surveys and send them exclusive offers.
-
Tailor marketing messages to address concerns raised in feedback.
These insights enable better audience targeting and improve the ROI of your campaigns.
5. Predict Trends and Forecast Behavior
With embedded surveys and real-time analytics in Salesforce, you can:
-
Track customer sentiment trends over time.
-
Forecast customer behavior and identify potential churn risks.
-
Update data metrics dynamically based on live survey responses.
6. Enhance Customer Support with Actionable Data
Salesforce’s Service Cloud combined with Zonka Feedback surveys creates a powerful feedback loop. Negative feedback can trigger automated workflows such as:
-
Assigning follow-up tasks to the relevant team.
-
Escalating issues to ensure they’re resolved promptly.
These actions not only improve the customer experience but also build trust and loyalty.
In industries like healthcare, e-commerce, and finance, where customer experience is pivotal to business success, embedded surveys play a vital role in maintaining strong relationships.
7. Enhance Customer Feedback Collection With Merge Fields
When it comes to gathering meaningful customer feedback, Salesforce surveys integrated with merge fields offer a dynamic and personalized approach. By leveraging merge fields, you can create surveys that automatically populate customer-specific details, making each survey experience seamless and engaging for your audience. For instance:
-
“Hi [First Name], how was your experience with your recent ticket # [Ticket ID]?”
Embed Surveys Seamlessly in Salesforce
Collect instant feedback by embedding surveys in Salesforce emails and drive meaningful customer experiences.

Step-by-Step Process to Embed Survey in Salesforce Email
Easily integrate Zonka Feedback survey builder to create and embed surveys into your Salesforce emails to streamline feedback collection and enhance customer engagement across your CRM. Follow these steps to set up your surveys:
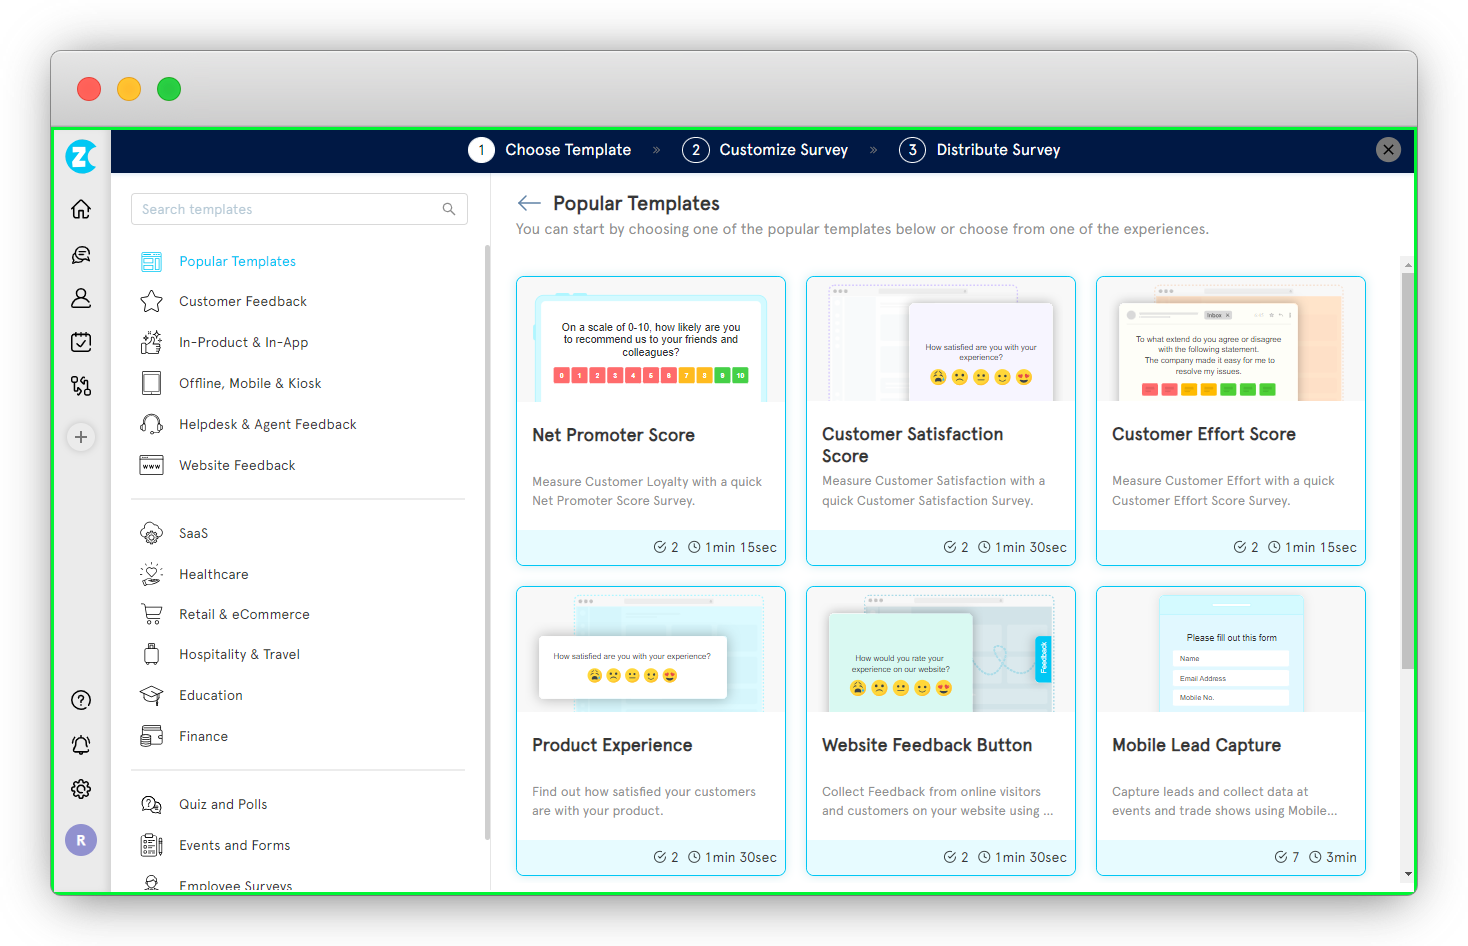
Step 1: Create Your Email Survey
-
Log in to your Zonka Feedback account and go to the "Surveys" section. Click on “Add Survey” or the (+) icon to create a new survey.
-
Choose from a variety of templates or start from scratch. Zonka’s AI tools can also assist you in designing your survey quickly and effectively.

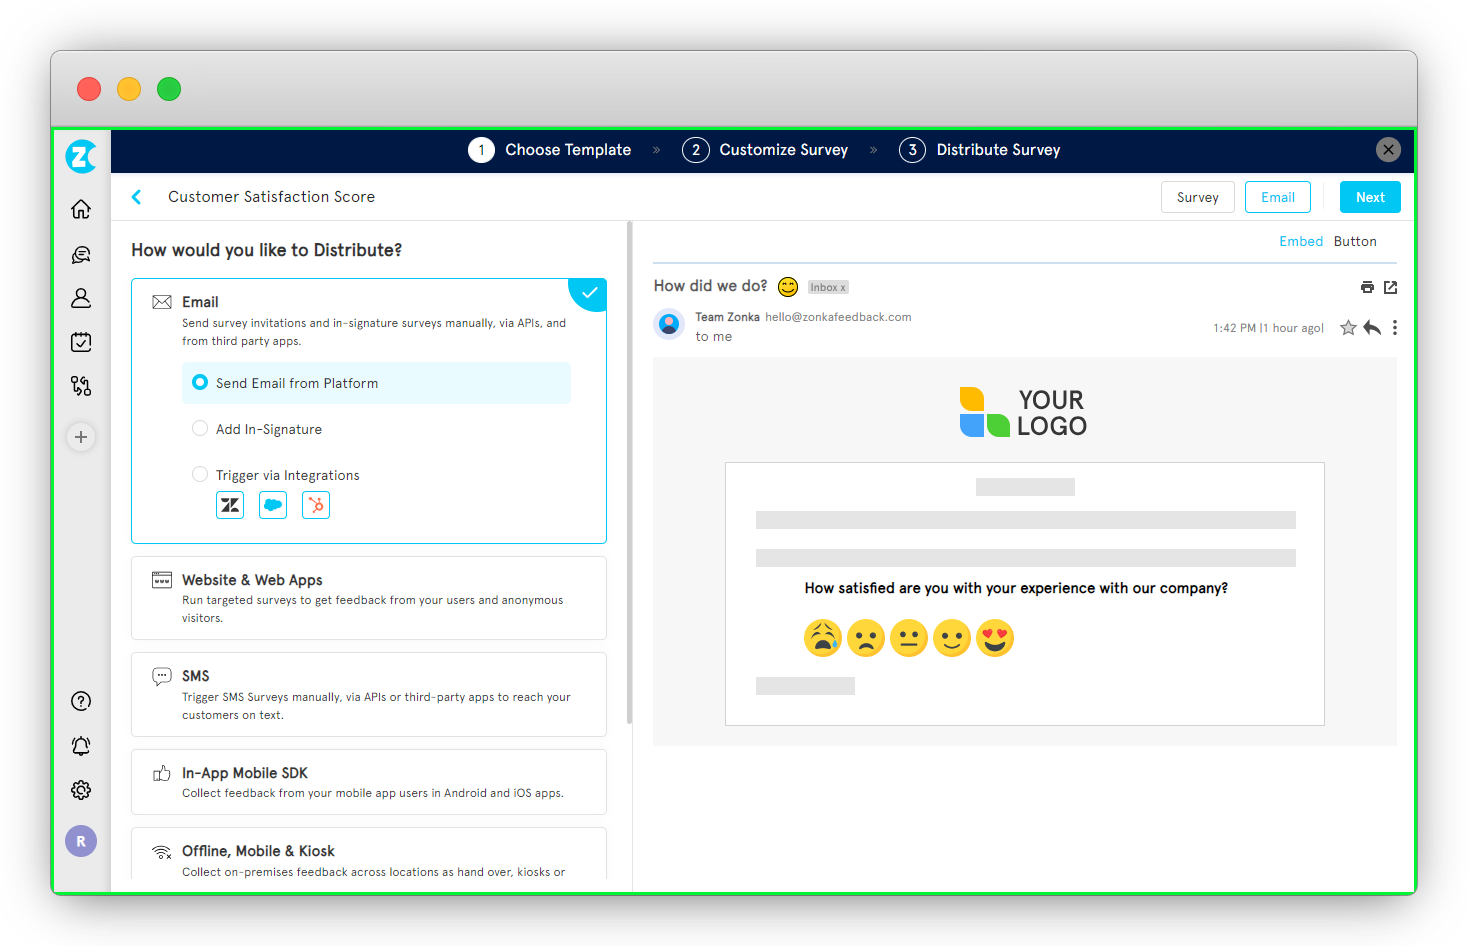
Step 2: Select the Distribution Channel
-
Once your survey is designed, select your preferred distribution method. A preview of your survey will be displayed.
-
Choose the Email option as your distribution channel and click "Next." Provide a survey name and an optional description to help with internal tracking.

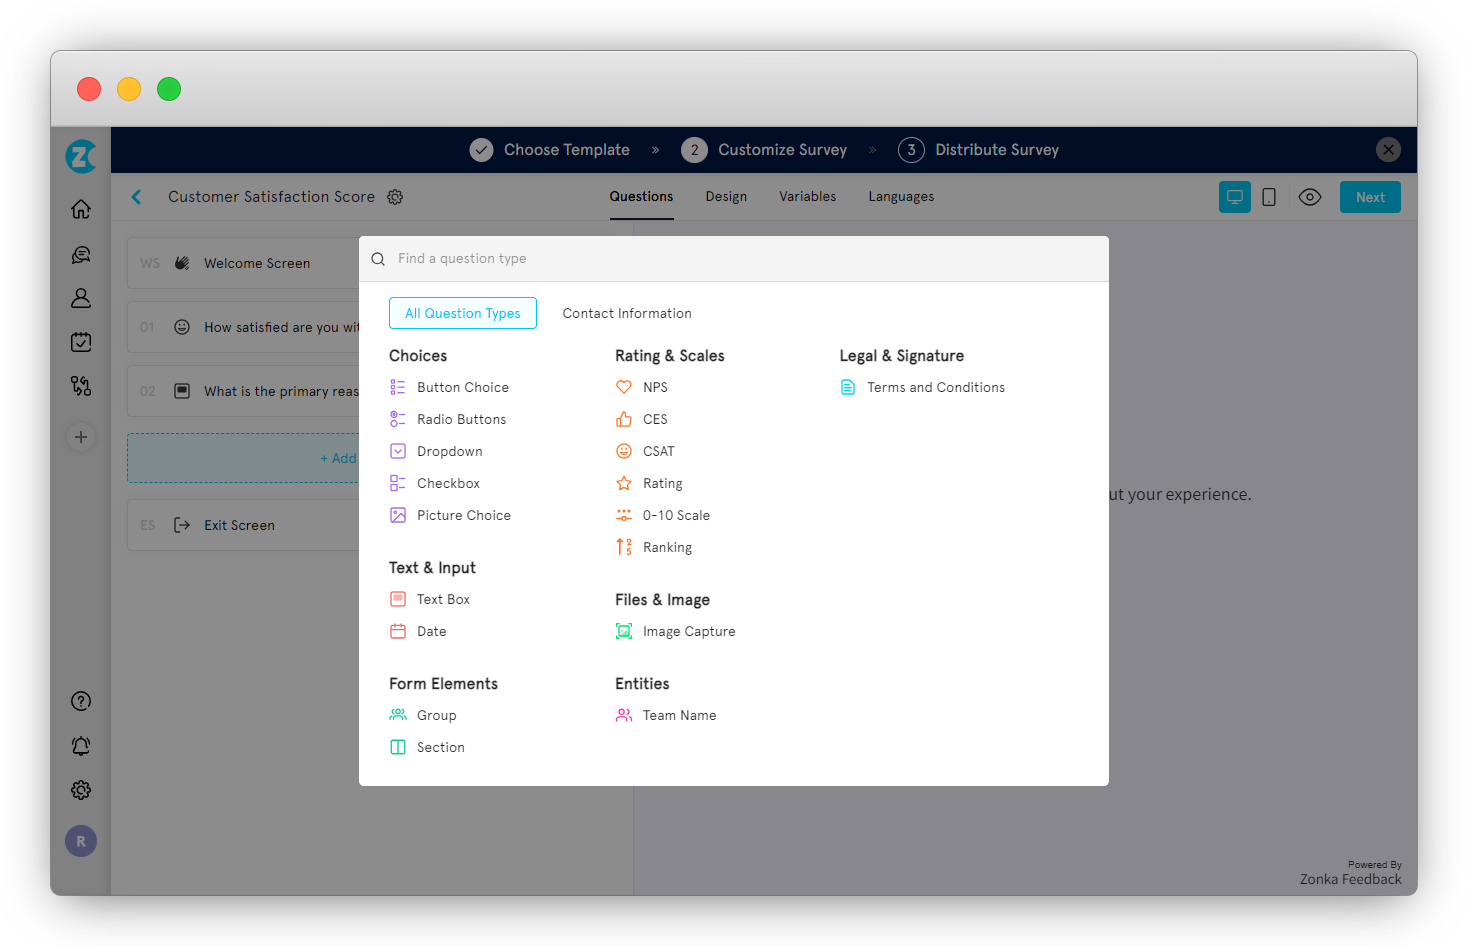
Step 3: Customize Your Survey
After choosing email as the distribution channel, personalize the survey to align with your goals:
-
Add or edit questions using popular formats like NPS, CSAT, or CES.
-
Apply custom themes to match your brand’s colors and design.
-
Use survey logic to create dynamic flows based on user responses.
-
Enable multilingual support for surveys to cater to a global audience.
Brand the survey further by incorporating your company’s logo and style elements. Once satisfied, click “Next” to finalize the survey for embedding.

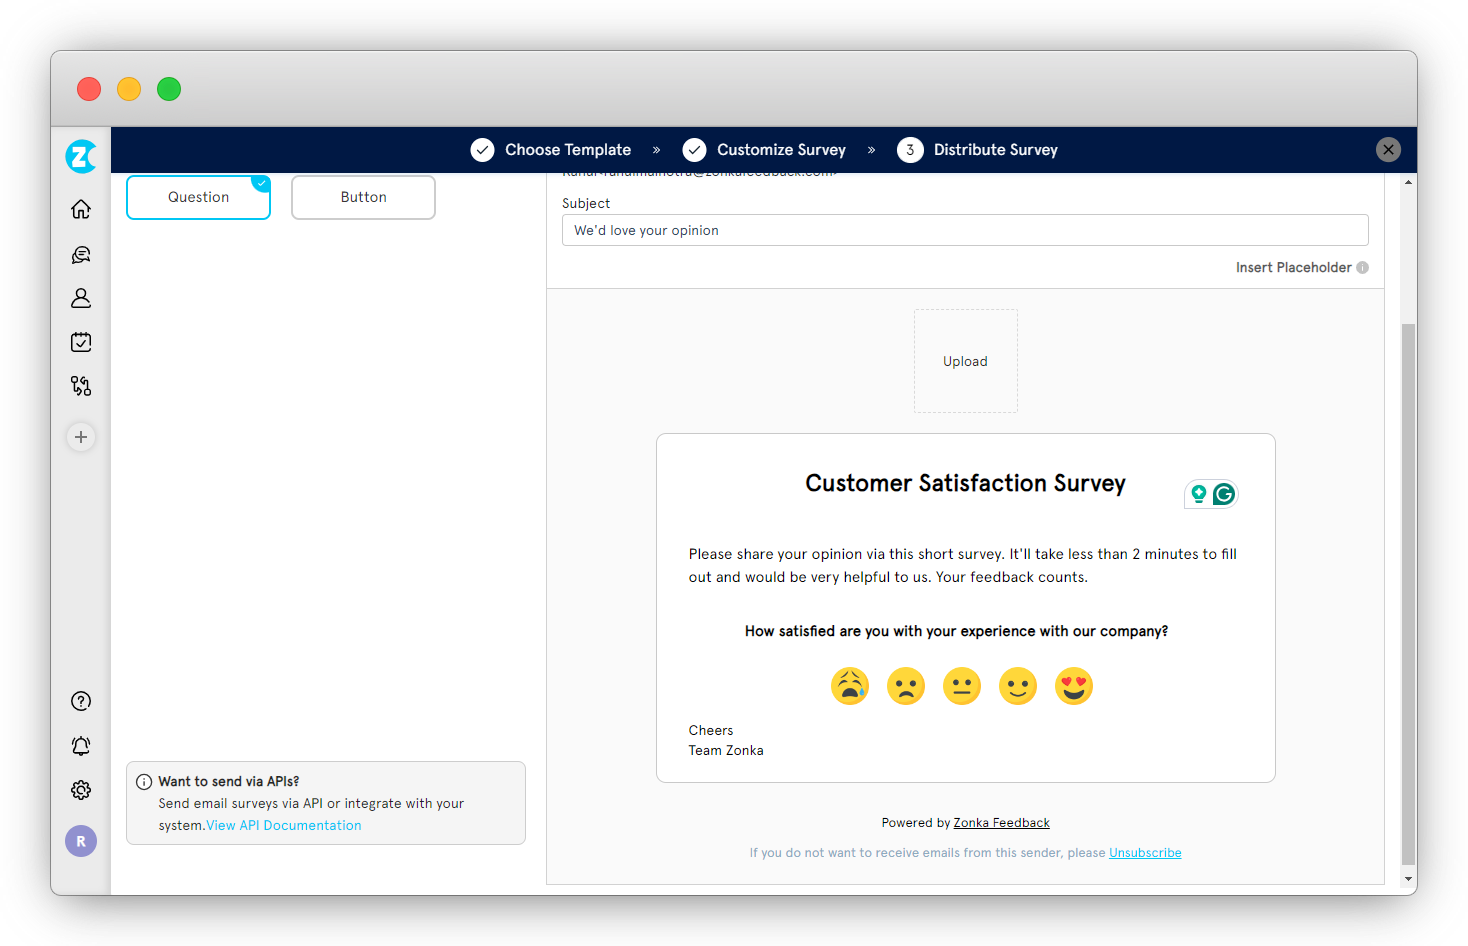
Step 4: Choose the Embed Format (Question or Button)
Decide how you’d like the survey to appear in the email—either as a single embedded question or as a clickable button.
-
For a seamless experience, embed a single survey question directly in the email body.
-
Alternatively, add a button with a clear call-to-action that links to the full survey.
-
Craft a compelling subject line and a personalized message for your email. Use placeholders for customer details to ensure tailored communication.

Step 5: Export the Survey for Salesforce Integration
-
Once the survey setup is complete, navigate to the “Distribute” section in Zonka Feedback. Select the survey and choose “Download Email Templates.”
-
From the list of platforms, choose Salesforce to download a compatible Salesforce email template in HTML format.
-png.png?width=2022&height=1258&name=frame_generic_light%20(19)-png.png)
Step 6: Embed the Survey in Salesforce Email Template
-
Open the downloaded HTML file and copy the code.
-
Log in to your Salesforce account and navigate to the email template editor. Paste the HTML code into your HTML email template to embed the survey seamlessly.
-
Select your target recipients from Salesforce’s contact or lead database and send your survey email.
How to Embed Survey in the Signature Section of Salesforce Email
You can enhance your Salesforce emails by embedding Zonka Feedback surveys directly into your email signature. Follow these steps to set it up:
Step 1: Design Your Survey
-
Log into your Zonka Feedback account and go to the "Add Survey" section on your dashboard.
Choose "Email Signature Survey" as your survey type and start building it. You can use AI-generated designs, pre-built templates, or create a custom survey from scratch. -
Select the "Add In-Signature" option under the distribution methods to generate a live preview of the survey on the side panel. Click "Next" to name your survey.
-
Customize the survey further in the editor by adding or modifying questions, applying themes, and enabling advanced survey logic such as skip or hide rules. Starting with a rating-based question like an NPS score is a great way to encourage engagement.

Step 2: Set Up the Email Signature
-
Decide how your survey will appear in the email signature—whether as a visible question, a clickable survey button, or as a survey link.
-
Enhance the survey by passing dynamic parameters (e.g., ticket IDs or assigned agent email addresses) to make the feedback more actionable. This customization adds context to responses and improves analytics.
Step 3: Preview and Embed the Survey
-
Preview your survey to ensure it aligns with your expectations and fits well in the email signature.
Select Salesforce as the email platform and click "Copy Code" to copy the appropriate embed code. -
Log in to Salesforce and navigate to the email signature editor. Paste the copied code into the signature section.
Your email now has a survey ready to collect valuable feedback, directly through Salesforce emails, enabling better customer insights and improved engagement!
-png.png?width=2022&height=1258&name=frame_generic_light%20(20)-png.png)
Try Zonka Feedback for Free!
With Salesforce and Zonka Feedback integration, gathering customer insights is easier than ever, enabling you to make data-driven decisions to enhance customer satisfaction. Try Zonka Feedback for free for 14 days and start collecting feedback effortlessly and efficiently.


